

How To Install Cameras On A Wi-fi Nvr Security System
XMeye NVR Security Camera Systems Manuals
After the normal kicking, y'all have to log in first and the organisation will provide the corresponding function according to the user'south rights.
Correct click the mouse – (Main Menu)
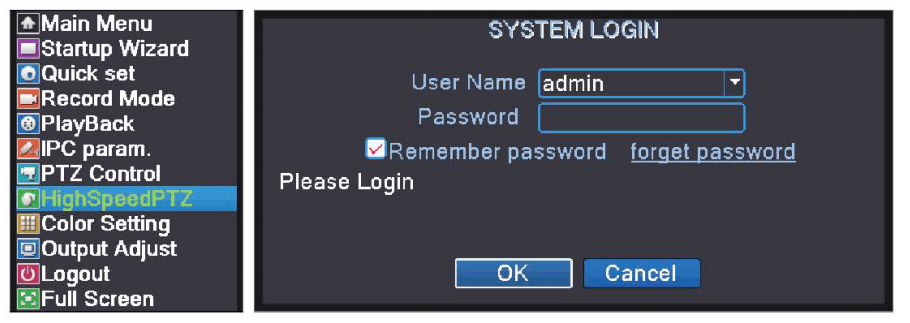
Default username: admin
Password:(leave it bare, null password)
Right click the mouse > 【Primary Bill of fare】>【Advanced】>【HDD info】
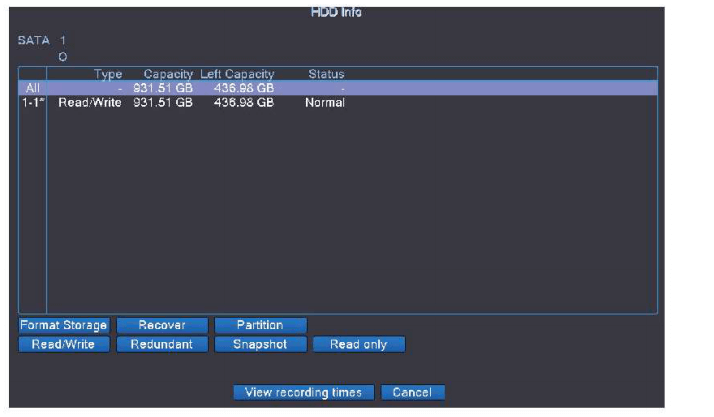
Cull the Hard Deejay, click Format Storage, start to format the HDD.
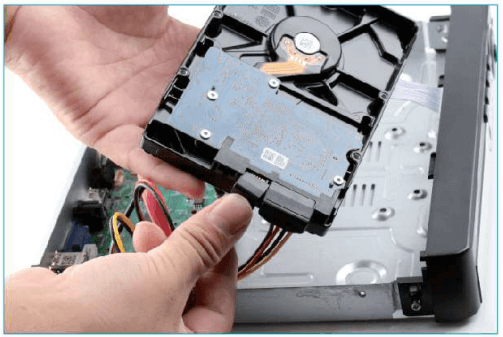
Find: Please ostend the Hard disk is connected. The difficult deejay should be formatted before first apply, so that it tin record. It will be automatically overwritten when the Hard Deejay storage is ful I if you set up overwrite.
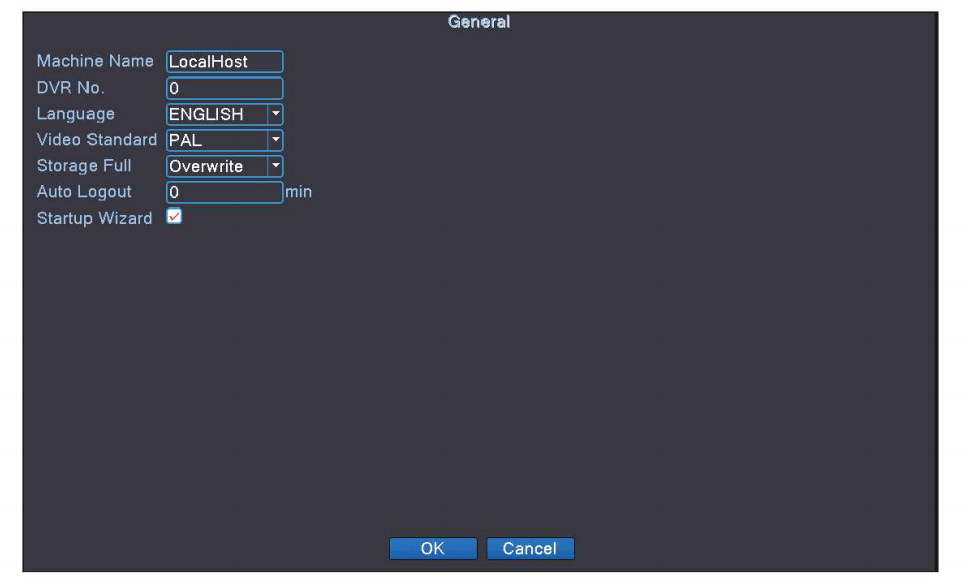
Correct click the mouse > 【Main Menu】>【System】>【General】
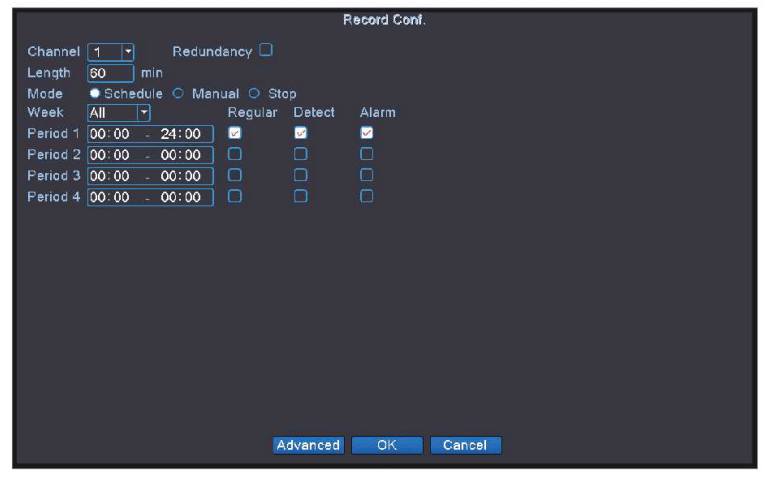
Right click the mouse >【Primary Carte du jour】 >【Tape Conf.】
Right click the mouse >【Primary Menu】>【PlayBack】
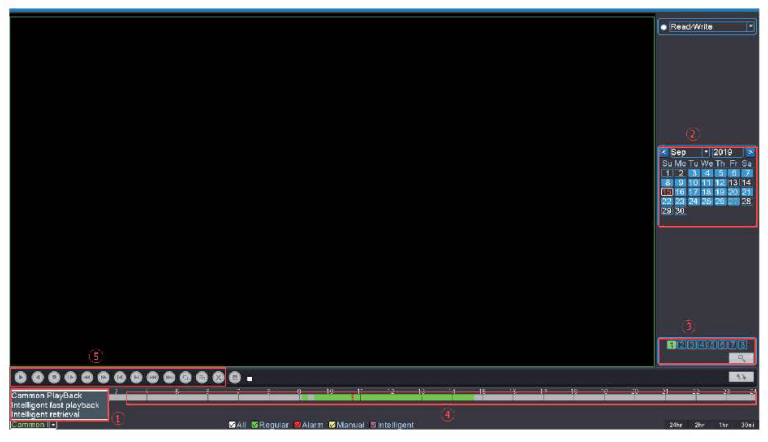
- Choose Play Style
- Choose Video Appointment
- Playback Channel Option
- Video Playback Fourth dimension
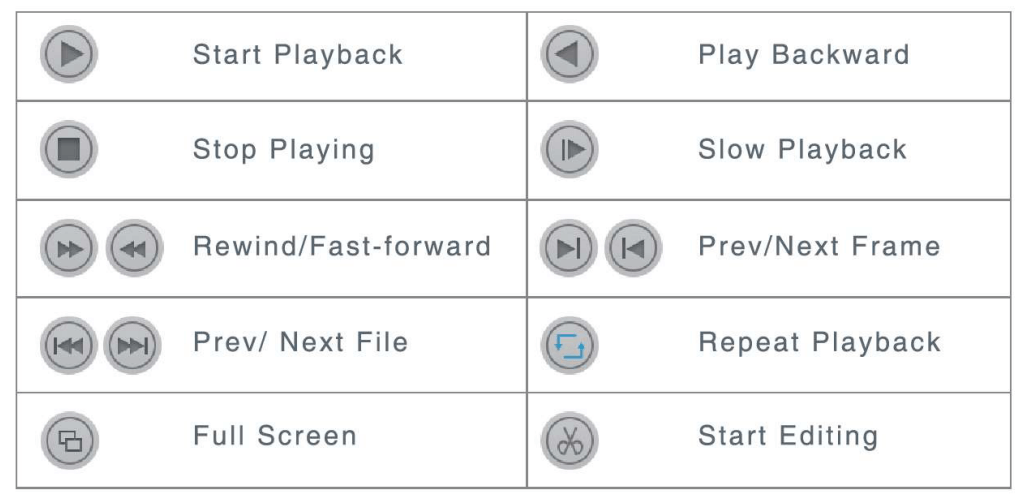
- Playback Control Key
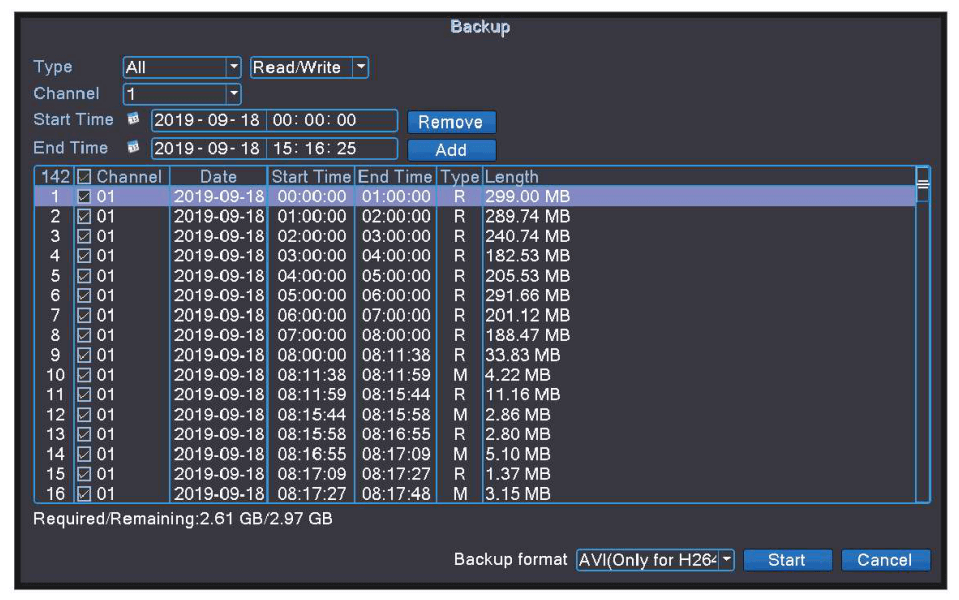
Correct click the mouse > 【Chief Menu】> 【Organisation】> 【Backup】
Right click the mouse >【Principal Carte du jour】>【Warning】>【IntelI igent Warning】
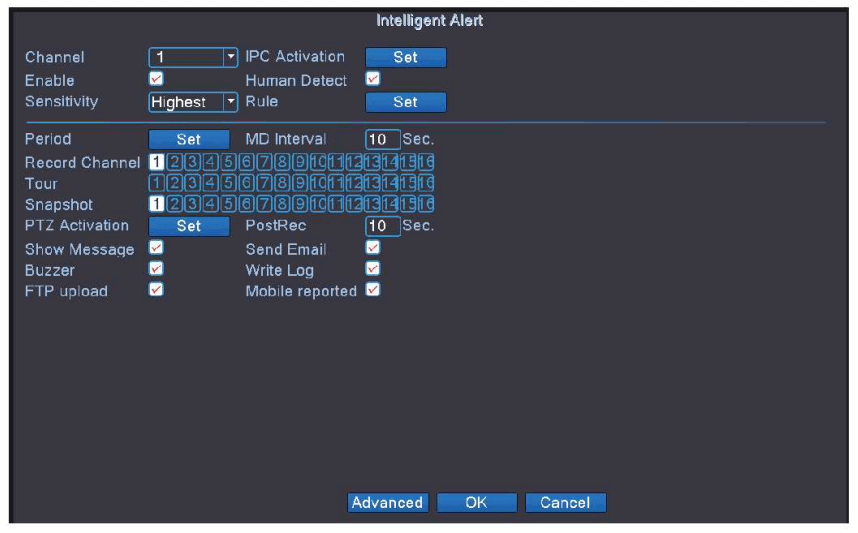
[Channel] Select demand Aqueduct.
[IPC Activation] Set Alarm Sound and voice Prompts.
[Homo Observe] When it detects people, it starts to tape movement.
[Rule] Set detect expanse rule.
[Flow] During the setting period, the device will trigger the alarm signal of human detection.
[Record Channel] Current channel you are setting is the Default Record Channel, when current channel detects motility, other aqueduct will tape motion if y'all cull other channels.
[MD Interval] During the interval time, there will trigger one alarm signal though is has motion detection for several times.
[Show Bulletin] Tick information technology to show Alarm Condition when detect motion.
[Buzzer] Tick it to beep when detect motion.
[FTP upload] Tick it to send bulletin to FTP when detect move.
[Send Electronic mail] Tick it to send Email when notice motility.
[Write Log] Tick it to write log when detect motion.
[Mobile reported] Tick it to ship notifications to mobile via APP when detect movement.
Connect NVR to Router > Correct click the mouse >【Main Carte du jour】>【 Network】
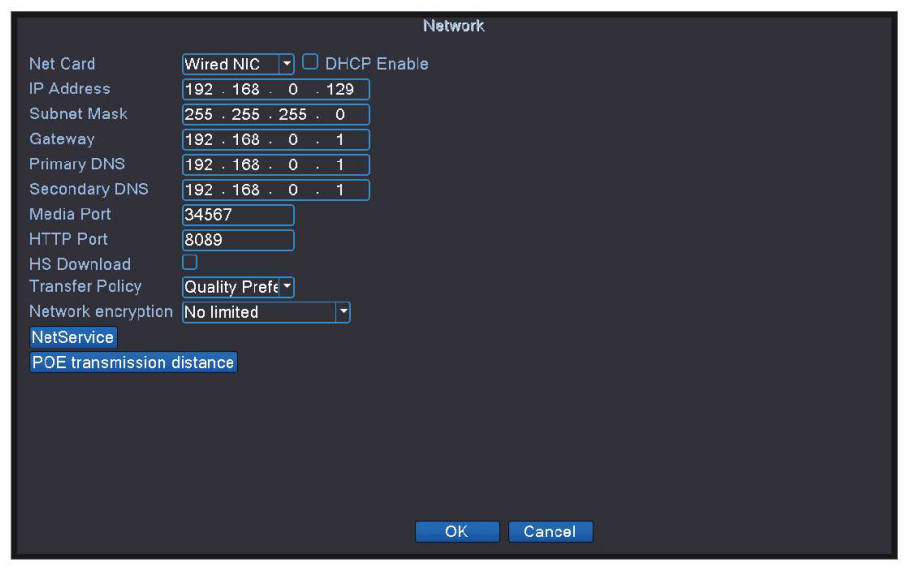
[DHCP Enable] Tick it to automatically obtain the IP address assigned by the server.
[IP address] Must be a unique IP accost on the same LAN segment to avoid conflicts with other equipment in local area.
[HTTP Port] a port number for remote visit, default value is lxxx.
Right click the mouse >【Main Carte du jour】>【Avant-garde】>【Version】
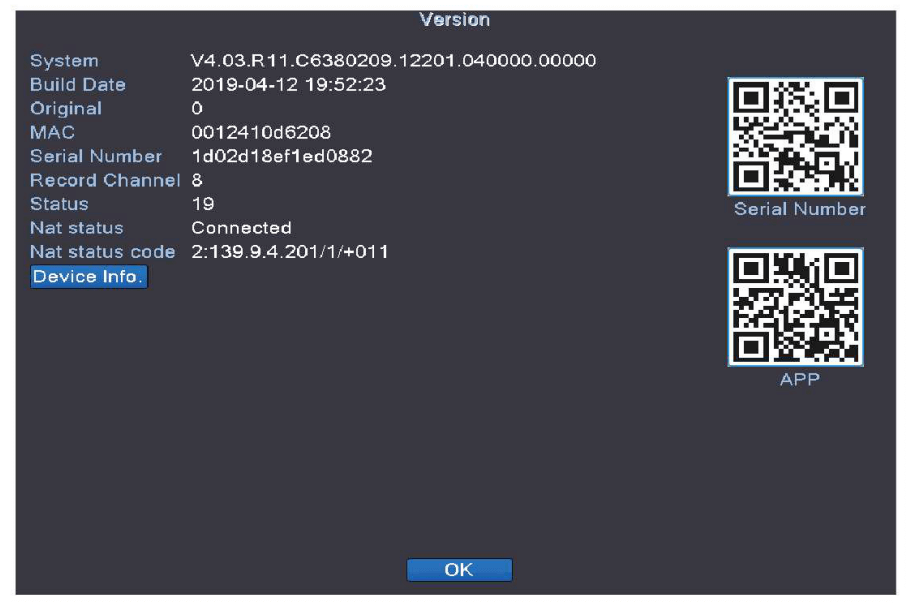
[Series Number] Device Serial Number for remote view.
[Nat Status] Check the network status, begin a remote monitoring when shows continued.
Right click the mouse>【Main Menu】>【Network】> 【NetService】>【Email】
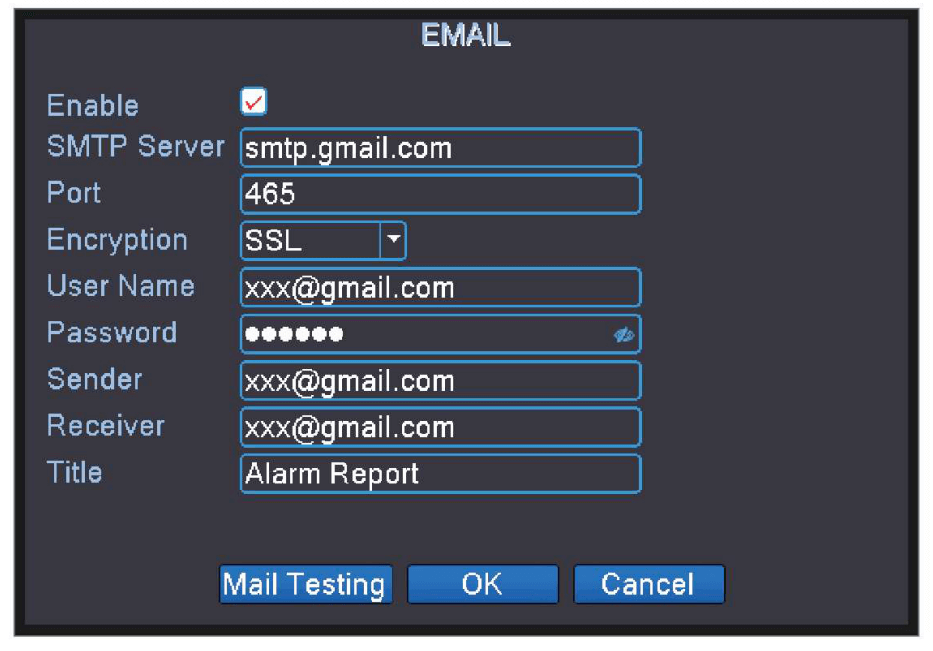
[SMTP Server] Sender's mailbox (for example: gmail e-mail).
[Port] Sender'due south mailbox SMTP port.
[Encryption] SSL
[User Name] Username of the sender's mailbox (must support and open SMTP part).
[Countersign] Password of the sender's mailbox.
[Receiver] Receiver'due south mailbox.
Click [Mail Testing] Send an email to receiver to test the Email setting.
Notice: Earlier testing the Email, please confirm the Network has been connected successfully. If it failed, then modify Encryption to TLS or NONE.
Correct click screen >【Principal Carte】>【System】>【Business relationship】
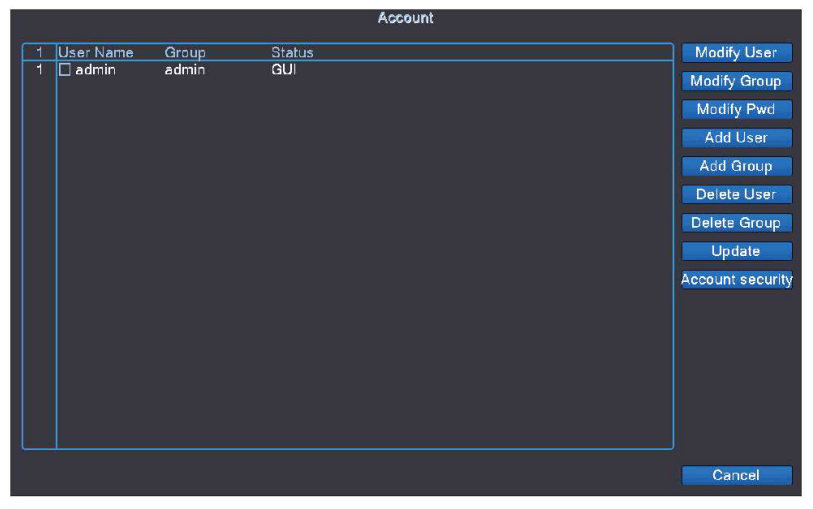
[Modify Password] Enter to Modify Countersign page, and modify countersign.
[Add User] Add User account and setup the User's permissions. Enter into the Add User folio, input the User Name and Password.
Discover: Password can be setup as number+letter combination, please record your password in other ways and keep it in a safe place to avoid forgetting.
Right click the mouse >【Main Menu】>【Organisation】>【Encode】
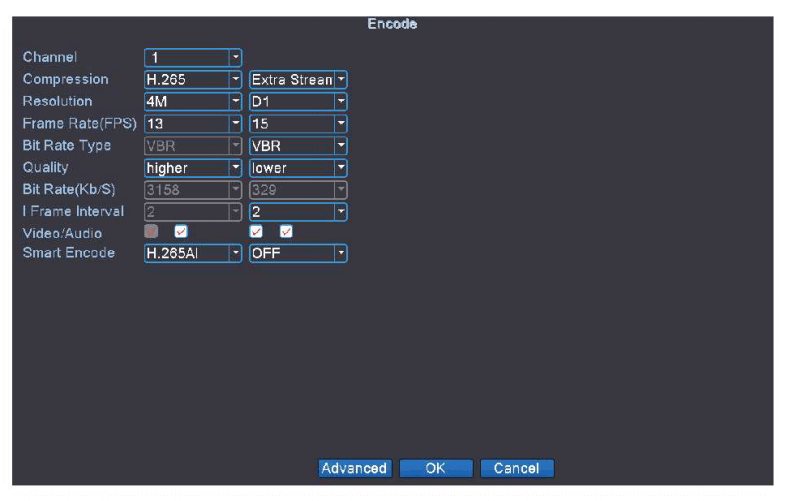
[Video/Audio] Four ✓ prove the video file for streaming video and audio
Open the IE Browser, enter https://www.xmeye.cyberspace, arrive at browsing page of remote view, choose "By Device". And so enter Serial No., Username, Password and Verify to realize remote view.
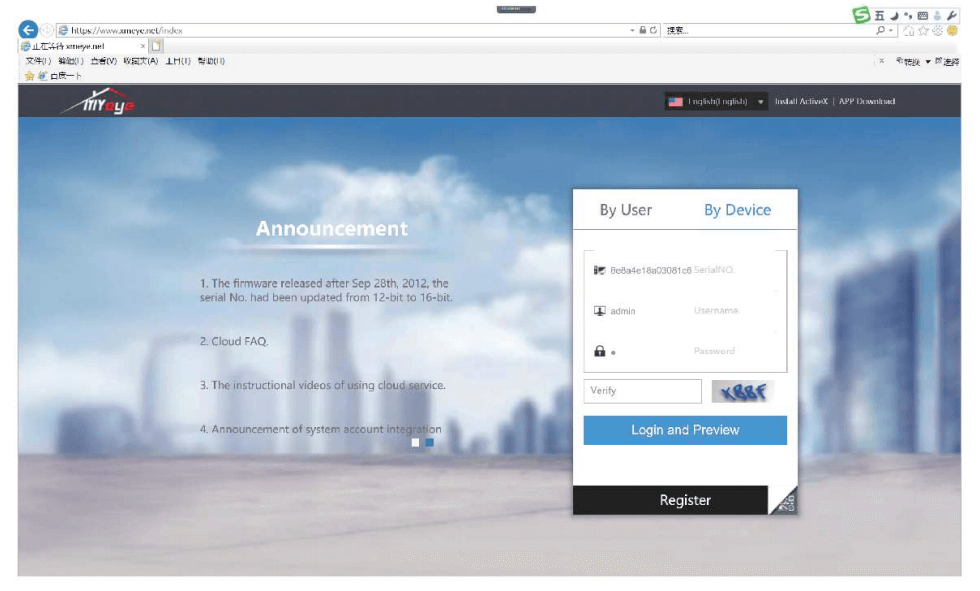
Serial No: Enter device Series Number
Username: admin (Default)
Password: Just leave it blank (every bit default null)
Please accomplish united states to get the latest management software for the PC. Open CMS PC client software subsequently installation.
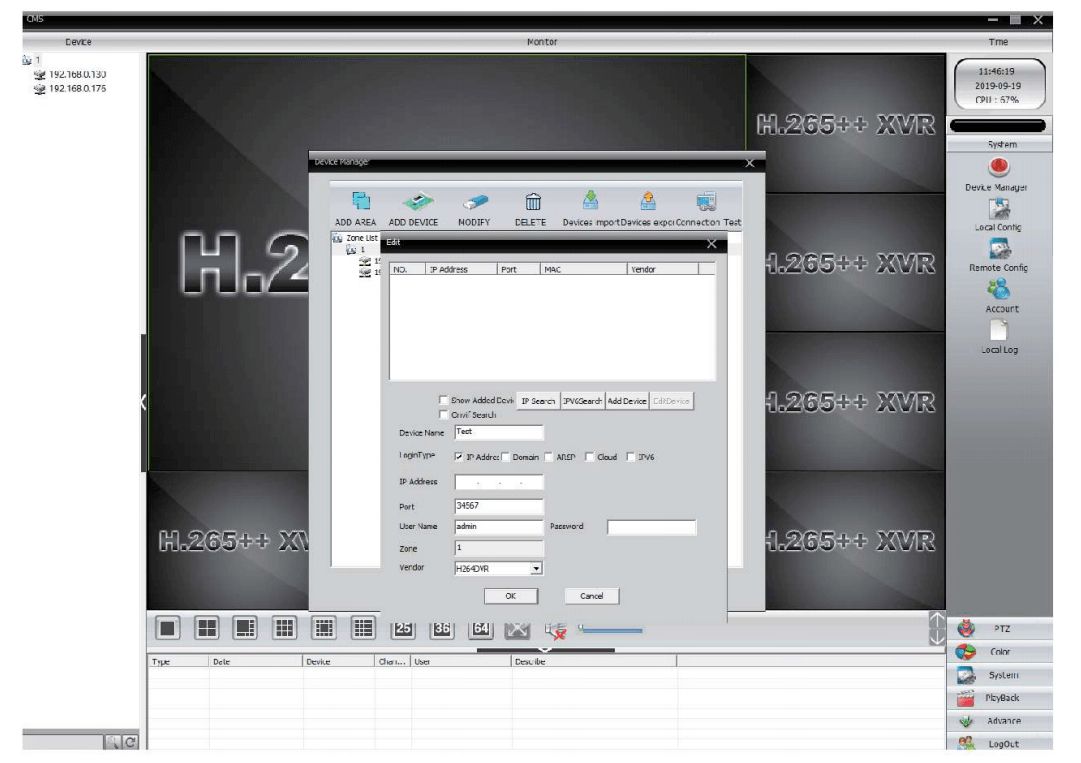
Click the card [System] >[Device Managing director] to add the Device.
Get-go, add together expanse, then add together device. Search the device's IP of device of LAN or choose Cloud Login Blazon and input Serial ID. After that yous can become remote view.
1.Install the software: scan the QR lawmaking or search XMEye in APP store to download.
When turn on NVR for the beginning fourth dimension > 【Photographic camera Test】> 【Time Setup Wizard】> 【Network】> 【Install Mobile APP】

2. Install successfully, register user, add together device and begin a remote view. Scan SN QR code
Username: admin (default)
Password: just get out it blank (default)

Step ane: Tap register and input your Username, password to create a new account
Step 2: Click "+" to add devices: input Serial No., username and password
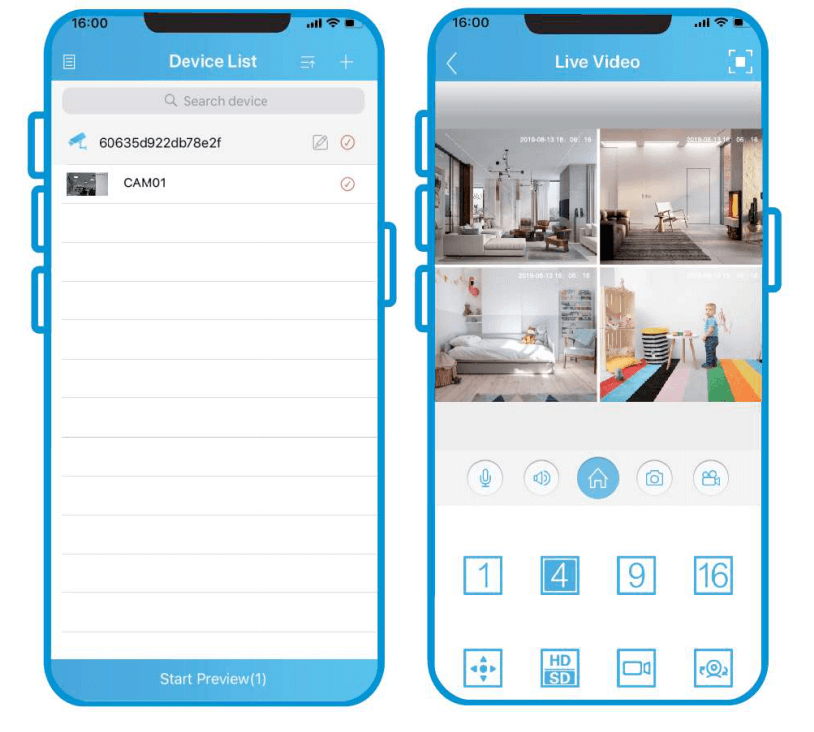
Step 3: After device added, click information technology to link the server
Step iv: Connect successfully and showtime to view video
Right click the mouse >【Principal Bill of fare】>【System】> (Digital】>【ChannelType】
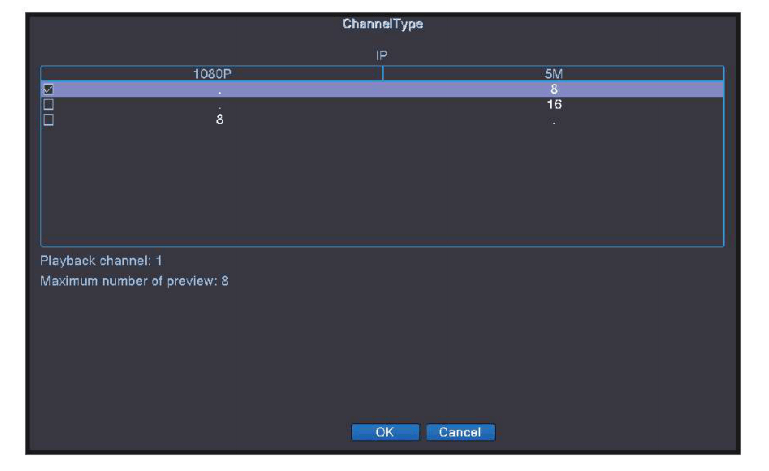
[Playback channel] number of channels that can playback simultaneously.
[Maximum number of preview] number of cameras tin be viewed simultaneously.
Tick in the modest to switch and restart.
Right click the mouse >【Channel Ready】>【IP aqueduct】>【Quick Set】
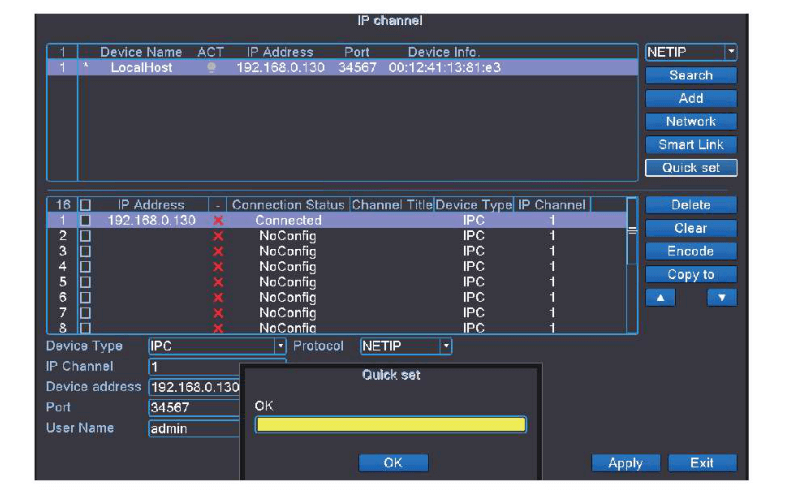
Notice: Please confirm the User Proper name and Countersign of IPC is right or the video volition not come out.

Source: https://xmeye.org/nvr-security-systems-manuals/
Posted by: burnhamromay1946.blogspot.com
0 Response to "How To Install Cameras On A Wi-fi Nvr Security System"
Post a Comment